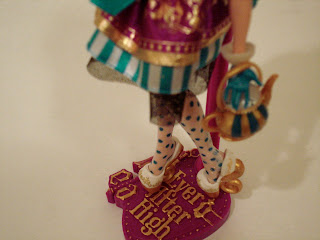
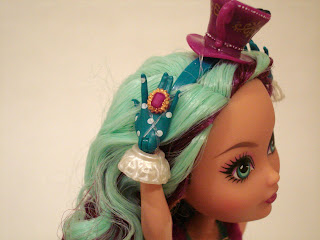
Today I'm going to show you how I added detail to my new Ever After High doll's plastic accessories with acrylic paint. Feel free to try it yourself! :)
It always amazes me when dolls have incredibly detailed molded accessories with little to no paint! I understand that it would be hard for a factory to paint every little thing accurately, so I just paint them myself!
Here we have Madeline Hatter. A super cute doll with sadly under-painted belongings. Let's help her out.
Things you will need:
- Plastic accessories (be sure you're willing to paint them. Acrylic paint usually can fleck off easily if you don't like it, but you've been warned!)
- Acrylic Paint (it needs to be acrylic to stick to the plastic without hurting it. No oils!)
- I use liquitex basics but most brands should work.
- Make sure you have colors that match your theme. For Madeline I only needed Metallic Gold, White, silver, and green and blue to mix her turquoise. :) And brown for the tea!
- A palette or something to squirt paint on. (Even a scrap of newspaper is fine)
- A very tiny brush and/or toothpicks. (I used a 10/0 Master's Touch spotter and round toothpicks)
- Water and paper towel to clean your brush off between colors.
- Creativity!
Let's get started!
1) The Hairbrush
Madeline comes with a great key hairbrush, but its molded details become lost in a sea of purple.
I painted it before I thought to take pictures, but it's easy enough. I used gold paint to highlight the logo, the dots, the key teeth, and some of the molded bands.
Close up on the design, don't worry about making it perfect since it's so small.
2) The Stand
The detail on this stand was what made me want to paint all of Madeline's stuff. It's so incredible and very easy to paint!
I started by painting the letters. However, painting on plastic is different from painting on paper or canvas. As you can see above, there are two very different methods between the E and the A. Since plastic is slippery, if you merely brush the paint on you get the thin coating of letter A. For letters E and V I carefully applied the paint by moving in small circular motions (like how you're supposed to brush your teeth) and dotting it. Don't be afraid to keep it thick. This is how you get it very opaque.
It looks better already. If an area won't get as opaque as you want it, let it dry and then do a second coat later. As you can see, my H isn't quite perfect yet, so I'll come back to it.
Next, dot all the dots with gold. I used a tooth pick for this.
Then, paint the key hole using the same thick circular technique.
However, I thinly brushed it on the tassels for a change in texture. Play around with the different techniques!
Paint the logo.
And finish off with dots down the key and a pretty E and A!
All done! Fun fact: I messed up on the Ever After "A" the first time but it easily wiped off! Acrylic won't really bond to plastic so this process is removable. You can wipe it off with a wet paper towel when it's still wet, or just scratch it off when it's dry. However, don't be afraid of it coming off. I didn't seal this design and it seems to be holding up well. If you want your paint to be permanent, however, just give it a quick spray with a clear acrylic sealer.
3) The Teapot
 |
| Before |
Maddie's Teapot is already adorable, but let's just highlight a bit of the details.
 |
| After |
Sorry this picture is a bit blurry, my camera doesn't like taking pictures this small! I added white to the dots around the top and base with a toothpick. I also used a toothpick to color the dots on the lid teal. Finally, I used my small brush to make the bow on top gold. This looks like a much more unified design to me! :)
(Tip: I mixed my white paint with a bit of metallic silver paint to give it a bit of a shine and make it a bit pearly. Not a necessity, but fun!)
4) The Ring!
 |
| Before |
This is probably my favorite modification--and the easiest! Just take Madeline's purple ring....
 |
| After |
And dot gold around it with a toothpick! :) Foolproof!
5) The Shoes
 |
| Before |
Maddie's shoes are pretty amazing by themselves. I just wanted the back filigree a little more noticeable.
 |
| After |
A little gold paint, and voila! This looks a lot harder than it was. Instead of individually painting each minuscule swirl, I dipped a toothpick tip in gold paint and then scrapped it lightly against my palette to remove the excess. I then lightly rubbed the thinly coated tip across the design and the ridges automatically caught the paint! Super easy!
6) The Hat
 |
| Before |
This is the modification with the most visual impact.
 |
| After |
Like on the tea pot, I dotted the dots white on the top and bottom. Then, to make it look like there's tea in her hat, I painted the inside varying shades of light brown, swirling the color. To finish it off, I painted the tea bag's string turquoise to match the rest of her outfit.
Magnifique!
7) The Necklace
 |
| Before |
Her necklace was really quick.
 |
| After |
All I did was outline the two circles next the the gold bow in gold using the same technique as her ring. Then I painted one gold bead on her right to balance the design.
And now, a photo shoot with her new accessories!
Thanks for reading! :)
Comments and suggestions welcome below!
Read my full review of Madeline Hatter HERE.
And read my thoughts on Ever After High HERE.


No comments:
Post a Comment